This is a W221 tutorial created for W221 owners with diesel engines.
How to change the heater booster system to a fully functional auxiliary heating system.
Tools & Stuff you need:

1.Torx 20
2.Wedge to leverage
3.StarDiagnosis with DAS devleoper or Vediamo + Multiplexer
4.Upper control panel (climate panel) with auxiliary switch
The MB STAR C4 (W221) with the diesel engines S320 CDI & S400 CDI are equipped as standard with an heater booster system. The heater booster switches itself on from an outside temperature of approx. 8 degrees independently and warms the cooling water, so that the engine comes faster to operating temperature. There are two types of heater booster systems: electrically operated and fuel operated. On the W221, fuel-powered heater booster were installed. These heater boosters are fully functional auxiliary heating systems from Webasto, which are only restricted in your control.
In the following course I describe what you can see, whether you have an heater booster system and what you have to convert, so that the booster can be used as a real auxiliary heater.
Standard climate switch (upper panel) without heater booster:

Cars with this switch can only use residual heat after a ride….
Climate switch (upper panel) with heater booster:

Only diesel vehicles have this switch… Heater booster turns automatically on an off, depends from the outside temperature…. You can also turn it on manually…
Climate switch (upper panel) with auxiliary heating:

This ist he switch you need to control your auxiliary heating system… Red LED turns on if the system is running… And the other LED turns yellow if you programmed a departure time
Start the modification:
Use the wedge and fold away the two covers….

…next step turn out the two Torx screws…

….after this leap out the grid to find tha last Torx screw….

….if you have all three screws turned out, leap out the wooden modling….


As can be seen in the pictures, now disconnect both plug connections and loosen the four screws. Then simply insert the new control unit. Installation in reverse order.
Once again everything is put together, now it goes to coding via SD connect C4…
You have to code these three ECU:
Central Gateway (Zentrales Gateway ZGW)
Upper Control Panel (Oberes Bedienfeld OBF)
Head Unit (Comand or HU221 in Vediamo)
You can choose two ways for coding:

1. way with Xentry online… or 2.way through ECU with DAS dev…

choose ecu central gateway….

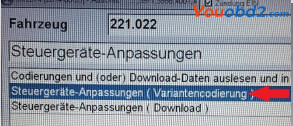
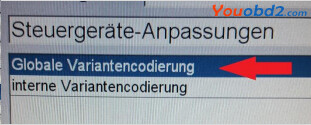
…. Now follow the red arrows….
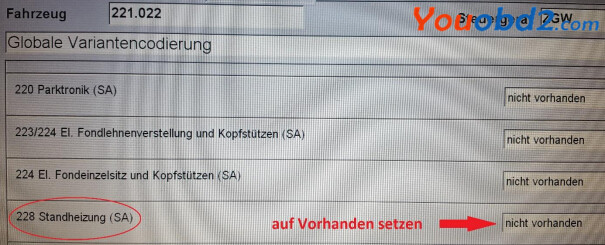
…Variantencodierung Globale Variantenkodierung…
… now change the equipment ?auxiliary heating“ on available….
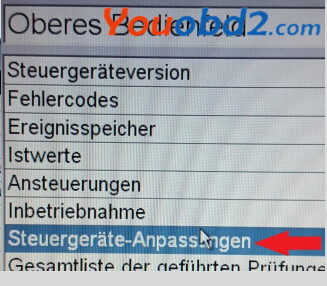

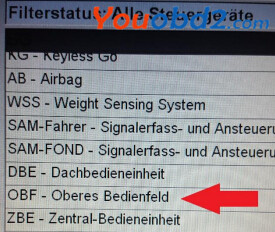
….. now switch tot he upper control panel and follow the red arrows….

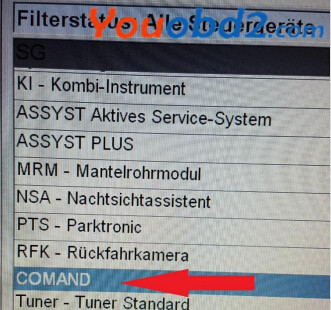
… change the option auxiliary heating (Standheizung) to available…
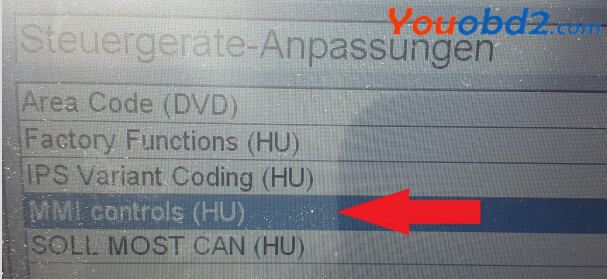
… the last step ist o change the settings in ecu head unit (comand)….
…. go to adjust ecu….
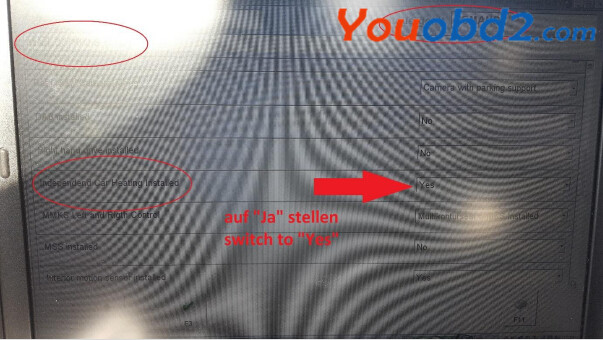
… select the section ?MMI controls“ ….
… last step, set the ?Independend Car Heating Installed“ option to YES…
Now all necessary steps have been completed and you have a full-fledged auxiliary heating system. Before using, turn the ignition off and then on again.
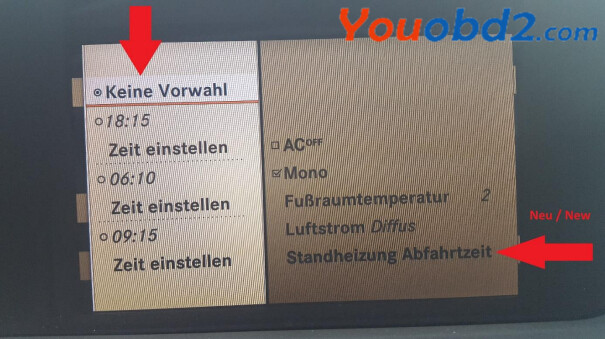
If you now open the climate menu in the head unit, you will find a new menu item: “auxiliary heating departure time” Here you can pre-program up to three departure times. Depending on the outside temperature, the system will heat up the car for up to 50 minutes.
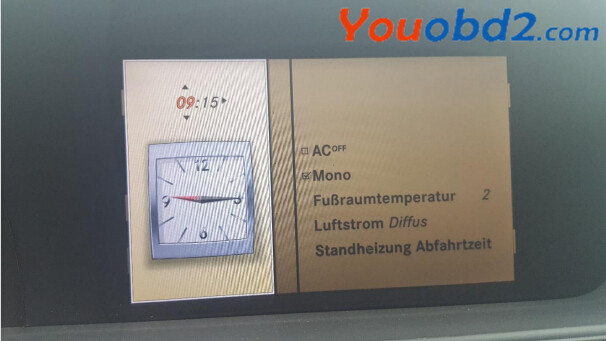
… new menu looks like this…..
Hints
To ensure proper heating, the air conditioning system must be in the automatic mode and a temperature of 22 ° C must be set (see operating instructions book W221).
The control unit for the air conditioning system will display an error in the future when reading out. The fault occurs because a valve for reducing the heating circuit is missing (heating of the room warms up a smaller cooling water circuit, the auxiliary heater warms the entire cooling water). The error has no effect on the functionality and can be ignored.
If you are technically savvy and want to “tinker”, you can also retrofit the control unit for the radio remote control in order to be able to program the heating from a distance (possibly also a Thermocall).
BIG THANKS to the contributor Jason_Calvin from the MH community!!! THANKS A LOT.
Much success in conversion!
http://chinaobdtool.net/2017/07/27/xentrydas-coding-for-w211-fully-functional-auxiliary-heating/


