Vehicles are becoming more complex by the day and while they still require mechanical work, many of the vehicle functions are controlled by complex on-board computers. If you are a DIY mechanic, you have probably understood the value of a good scan tool, but Ford’s IDS tool is the total package that will give you complete computer access in order to monitor and regularly check on the health of your vehicle.
This article applies to Ford Truck Models (1996-Present).
The Ford Integrated Diagnostic System (IDS) is a PC-based scan tool that was introduced with the advent of On-Board Diagnostics II (OBD-II) for all 1996 and newer Ford, Lincoln, and Mercury vehicles. Using Ford’s IDS software and their Vehicle Communication Module II (VCM II) will provide the same level of testing, diagnostic, and reprogramming capabilities as used by factory trained technicians on all OBD-II Ford Vehicles. With modern cars becoming more complex and using a variety of computers to control various vehicle functions, the IDS is a must have for the DIY mechanic. This article will explain the necessary hardware and software required, as well as the setup procedure for the Ford IDS scan tool.
Key Information
DIY Time: 15-30 minutes setup time
DIY Cost: $1600-$2400
Professional Cost: $100+ per hour of diagnostic time
Req. Skill Level: Moderate – Must have knowledge of computer systems to operate.
Materials Needed
IDS Compatible Laptop
IDS Software & License
VCM II connector
Step 1 – PC Requirements
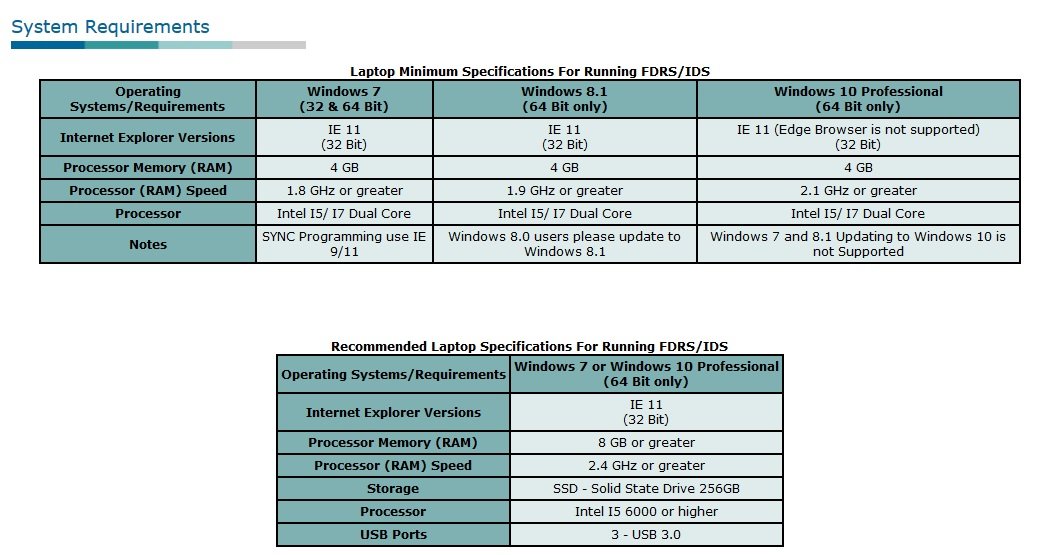
In order to use Ford’s diagnostic software, you will need a laptop capable of running IDS. Ford recommends the use of either a Panasonic Toughbook CF53 or a Dell Latitude E5440 for their touchscreen interfaces, but any laptop will be sufficient as long as it meets the IDS minimum system requirements. In fact, if you are using a newer laptop purchased within the last few years, chances are it will be sufficient to run the software. See Figure 1 for Ford’s minimum and recommended PC system requirements.

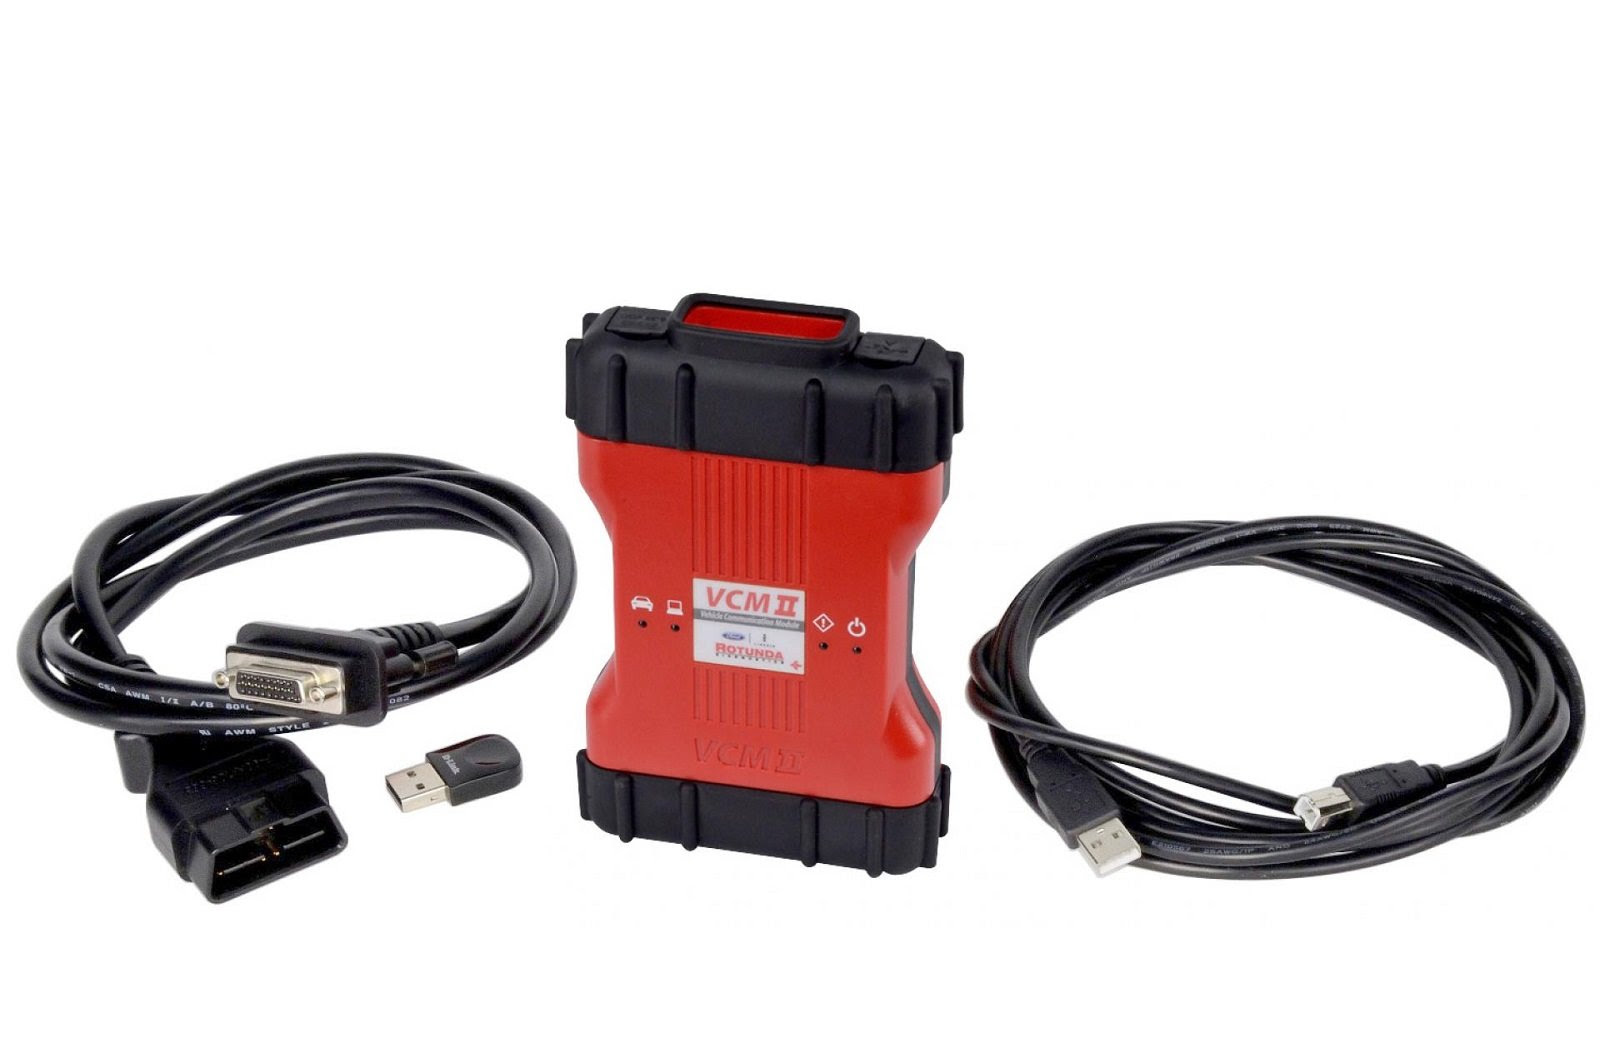
Step 2 – Obtain VCM Hardware
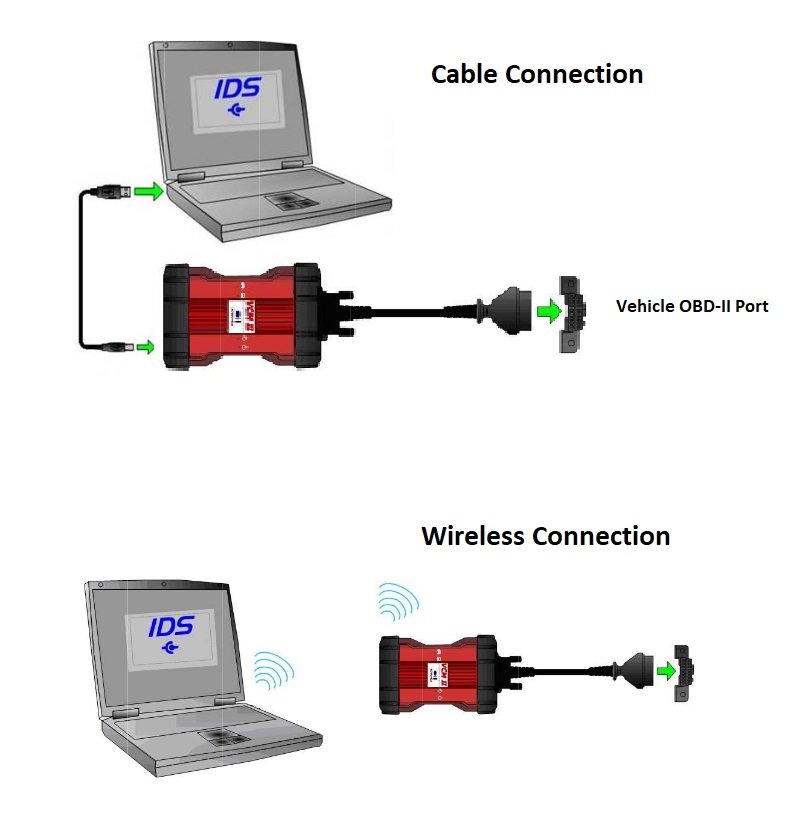
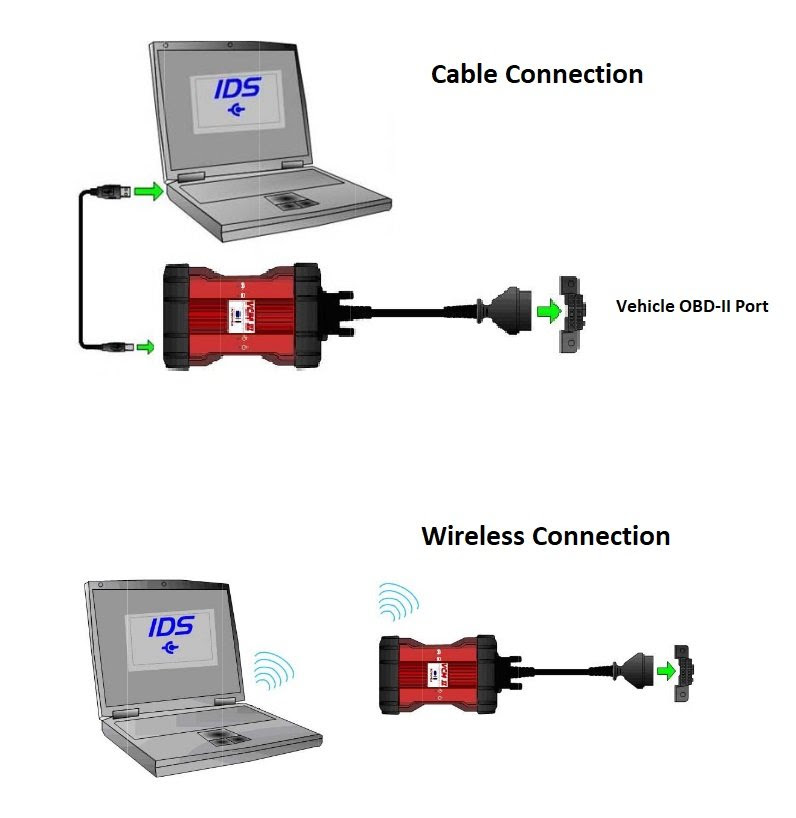
The Vehicle Communication Module II is the means by which the laptop will communicate with the truck. The VCM connects to the vehicle through the 16-pin OBD-II port in the driver footwell and can either be connected to the laptop through a USB cable or through 802.11 wireless technology. Wireless functionality has proven useful since one does not have to be sitting directly in the vehicle for diagnosis, but can instead be connected remotely anywhere in the shop. In fact, the unit was designed to be used wirelessly and only needs to be connected via USB for firmware updates or vehicle datalogging. The VCM II cable can be purchased directly from Ford Rotunda Specialty Tools Here.
Note:
The VCM II is the most expensive piece of the IDS diagnostic equipment. Various knockoffs are available for pennies on the dollar, but may require users to seek out older versions of the IDS software which may be difficult to obtain a license for and may not be compatible with every vehicle.
Step 3 – Download IDS Software
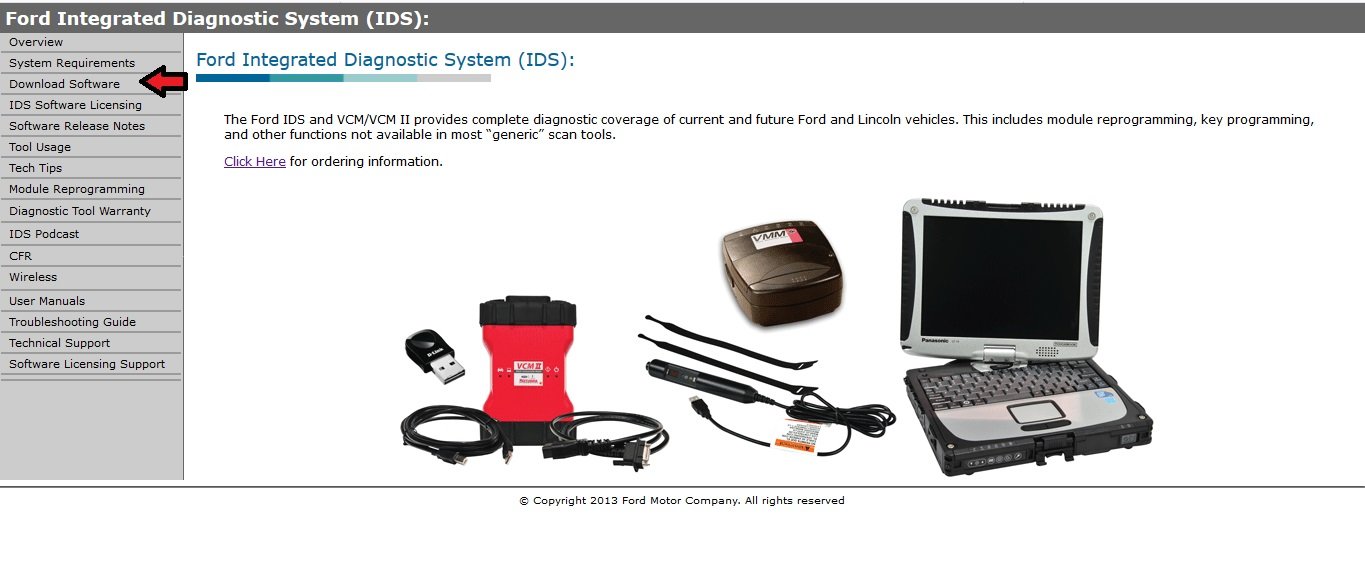
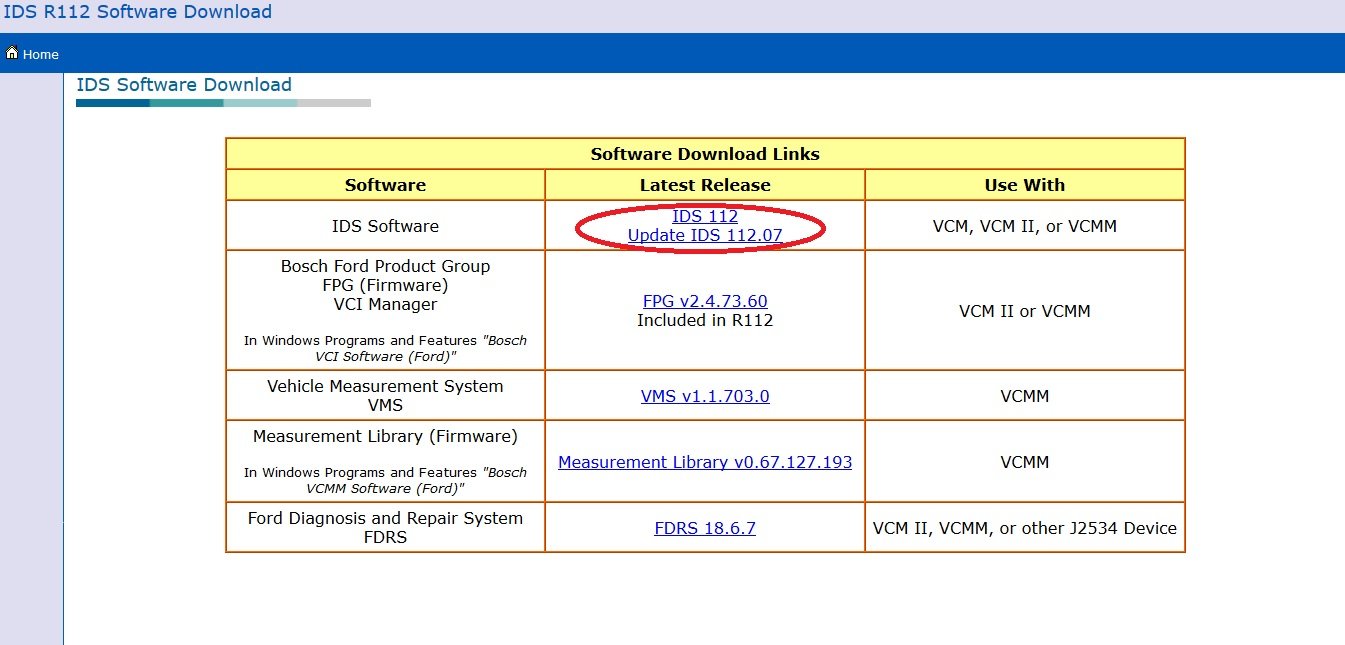
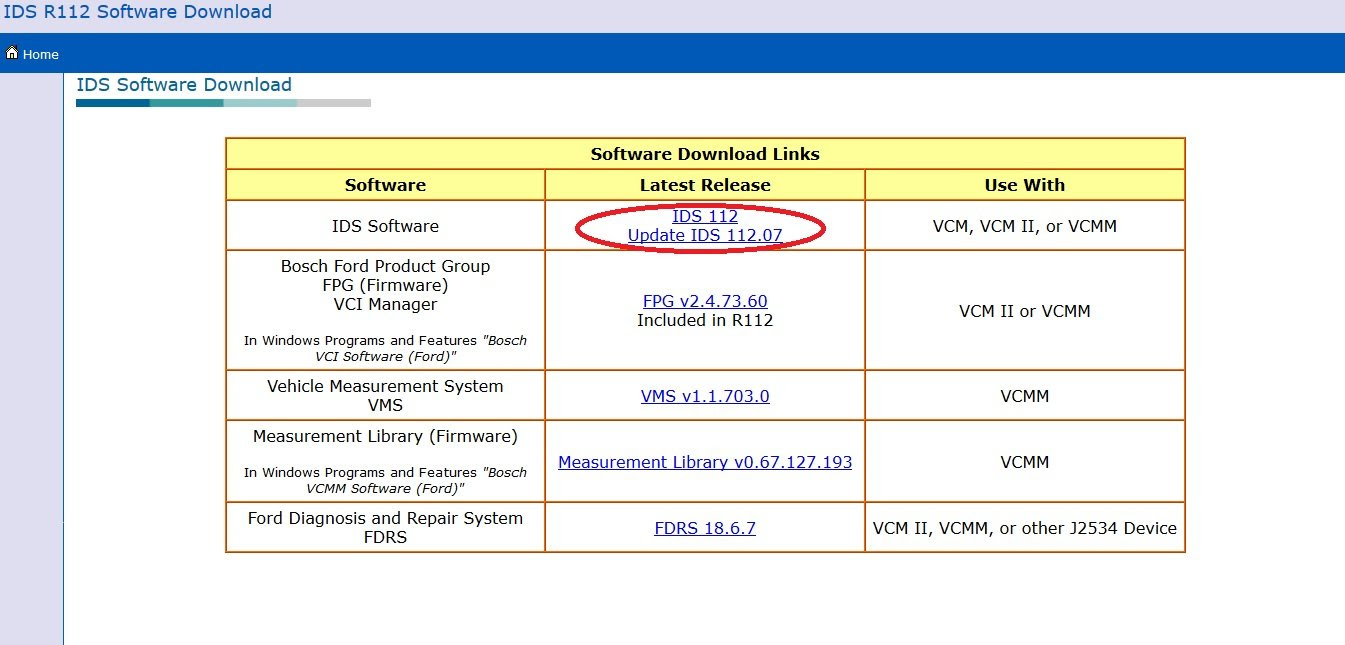
After you have a capable laptop and VCM II in your possession, you can proceed with downloading and installing the IDS software. Visit the Ford IDS website and click on ‘Download Software’ as shown in Figure 3. A second window should then open to allow you to select the latest IDS version available (Figure 4). Download and install the IDS software by following the on-screen instructions.

Note
The IDS software will function without a license, but will not be able to communicate with your vehicle. You can download the software before purchasing any hardware to see the program interface and view available functions of the IDS.
Step 4 – Obtain & Activate License
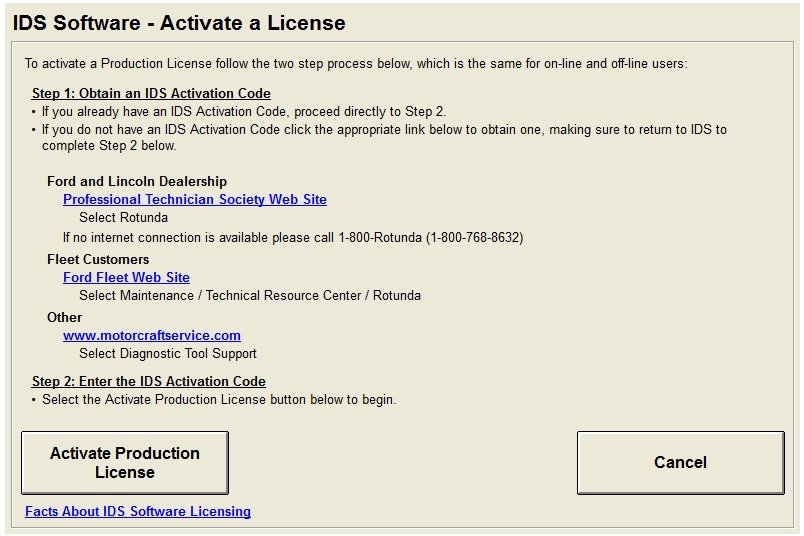
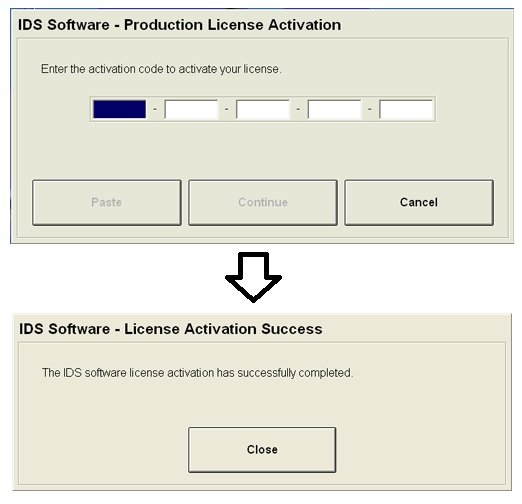
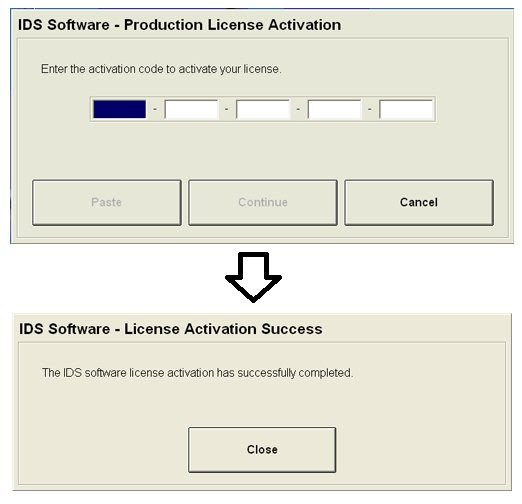
The Ford IDS software is a subscription-based service that requires a license in order to communicate with your vehicle. A license essentially unlocks all features of the IDS for your use. A license can be purchased for various lengths of time with the longest subscription lasting 365 days and the shortest at only 2 days. Upon opening the IDS program, it will notify you that you do not have a valid license and give you options of where you can obtain one (Figure 5). After purchasing a license, you should be prompted to enter the 20-digit license code to activate the program for use (Figure 6). Be aware that an internet connection is required for the code to be validated after being entered.

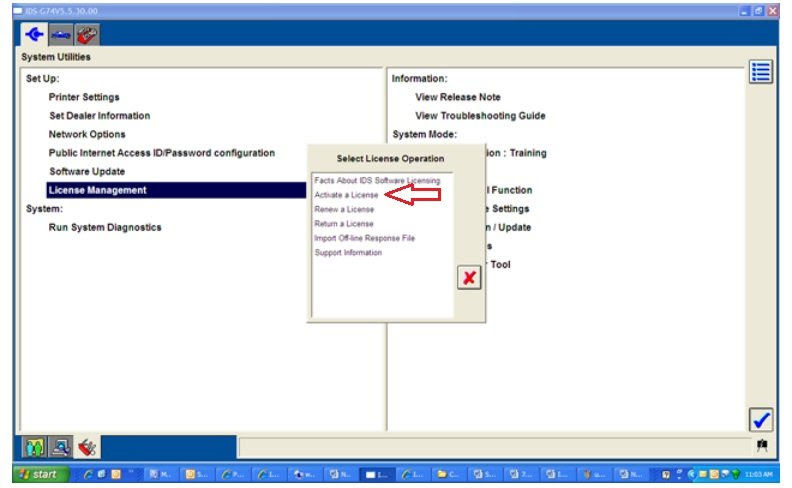
If you are not prompted with a license activation window, you can simply go to the Motorcraft website to purchase a license and then return to the IDS Set Up menu (under System Utilities) and select ‘License Management’ to input the code (Figure 7).
Note:
The IDS License will be mated to a single computer. Multiple computers cannot use the same license unless it is removed from one computer and transferred to another.
Step 5 – Begin Using IDS
Upon a successful license activation, you are ready to begin using the IDS. Simply connect the VCM II to the vehicle by plugging the 16-pin DLC connector into the OBD-II port and the provided USB cable (or wireless D-link adapter) from the VCM II to the laptop. Next, turn the vehicle key to the run position before running the IDS program as an administrator. Here you can start a new work session by selecting the vehicle icon.
At this point, the IDS can virtually test and monitor all vehicle systems as well as indicate any trouble codes.
Pro Tip:
Anytime you are reprogramming or diagnosing a vehicle using the IDS, it is strongly recommended that a backup file of the vehicle be created.
Step 6 – Keeping The IDS Updated
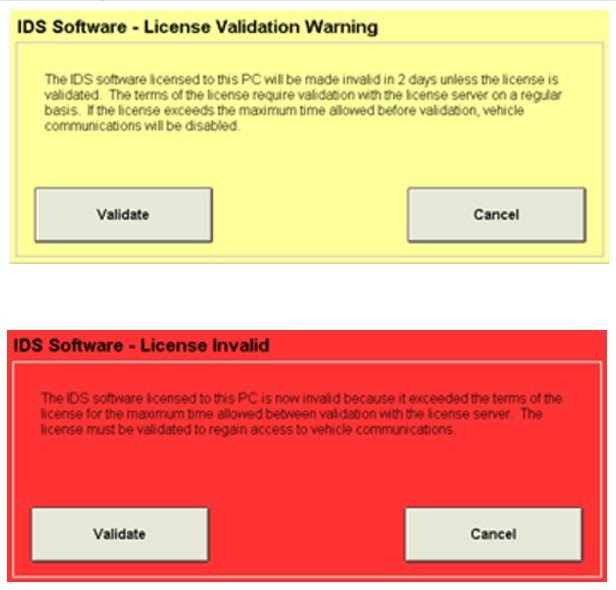
The IDS License must be validated with the server on a regular basis in order to keep using the service. This must occur at least once every 29 days or less by simply starting the IDS program and clicking the ‘Validate’ button that will automatically appear upon program startup. Similarly, if any updates are required, those must first be completed before continuing to use the program. If the license reaches the end of the term that was paid for, or is not validated once a month, the license will become invalid and the program will no longer be able to communicate with the vehicle.
Pro Tip:
The Ford Integrated Diagnostic System website contains a wealth of information on using and troubleshooting the IDS program.
https://fordtroublerepair.blogspot.com/2021/08/ford-f-series-how-to-use-ford.html
:: بازدید از این مطلب : 200
|
امتیاز مطلب : 0
|
تعداد امتیازدهندگان : 0
|
مجموع امتیاز : 0